If you want to visit Mi service centre for repair of any of your product or you have purchased a new Mi TV then you can do it from a single place.
Booking appointment before your visit to Mi service centre is very useful during COVID-19 pandemic. As booking prior to your visit save your time and confirm the spare parts availability.
Follow the simple steps to book Mi service center appointment for repair of any Mi product.
Book Mi service centre appointment
It is very simple to book Mi service centre appointment to repair your Mi products at nearby authorised Mi service centre. And there are two ways to book it.
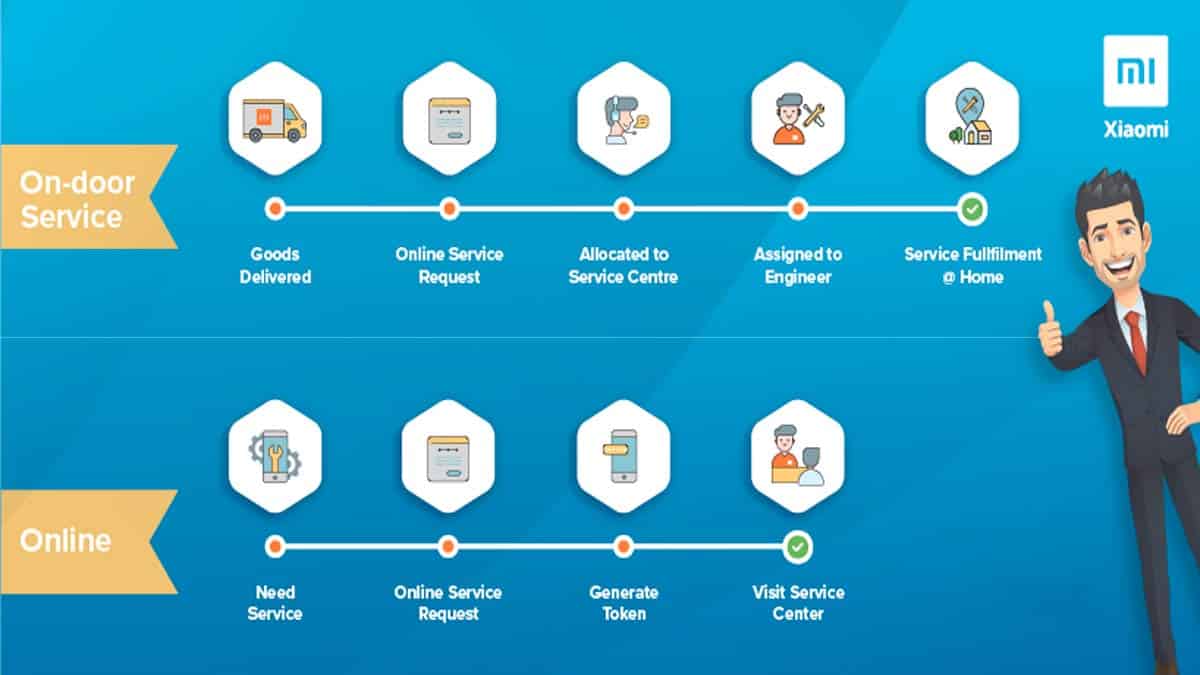
Mi provides two types of appointment booking facilities to its valuable customers. Both of these appointment booking are free to use, which are as follows:
On door Appointment
On Door Appointment is available for the repair facility of TV, Water Purifier, Robot Vacuum Cleaner, Mobile and Laptop.
Service Center Appointment
This facility is available to small size products like Mobile, Laptop and Accessories which are easy to carry.
Book Mi Appointment with Mi Service Manager
- Get ready you IMEI number or Serial/Product number of your Mi device.
- You can dial *#06# in your smartphone to get IMEI number of your phone.
- You can find serial number on product box.
- Product ID can also be find in mail sent by Mi.
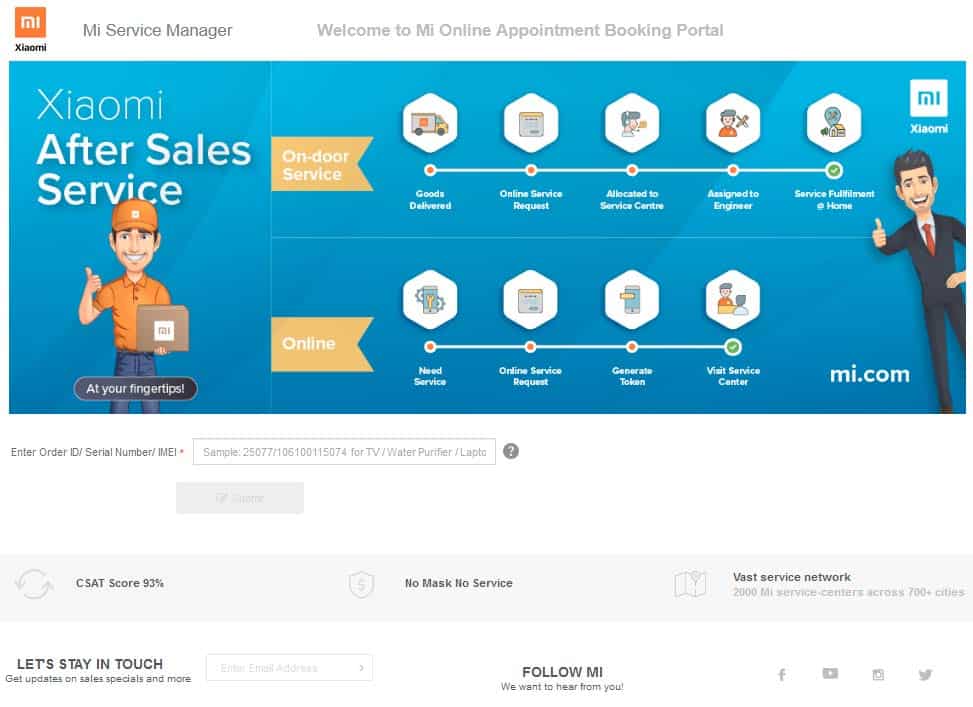
- Now go to Mi Service Manager website to book appointment.
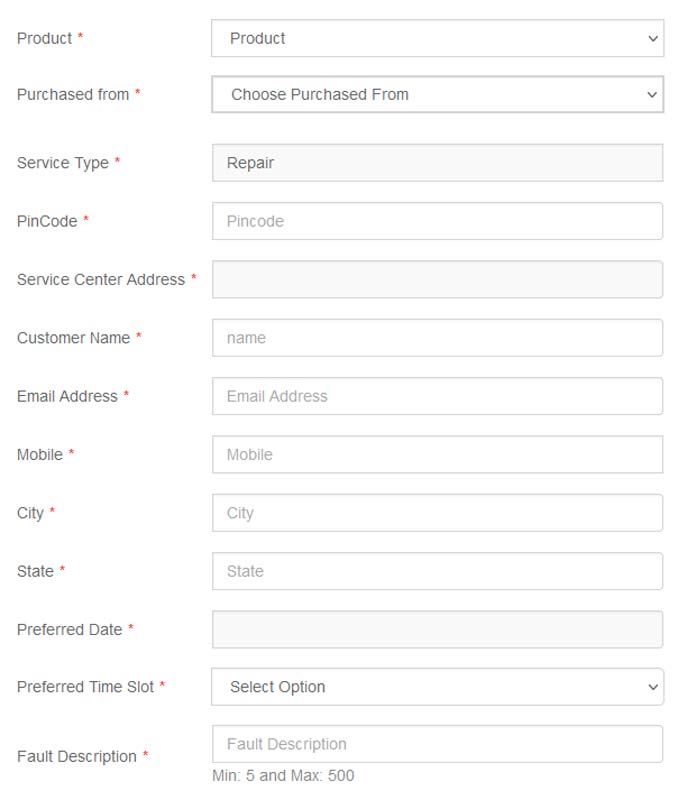
- Select the product type from the drop-down menu.
- Select the the product purchased from option from the drop-down menu.
- Select Repair in Service type.
- Provide the following details:
- Enter Pin Code Service Center Address will auto select.
- Customer Name
- Email Address
- Mobile Number
- City
- State
- Preferred Date
- Select preferred time slot.
- Fault description
- Accept the terms and conditions from the check box.
- Click on Submit.
- Verify the CAPTCHA.
- Verify mobile number for the successful booking of your appointment.
- You have all done. You can now visit at your booked date and time.
Book Mi Appointment using Mi Store App
- Click Here to Download the Mi Store app.
- Install and launch Mi store app in your mobile.
- Click on Account option at bottom right corner of Mi app interface.
- Now scroll down and click on Service centers.
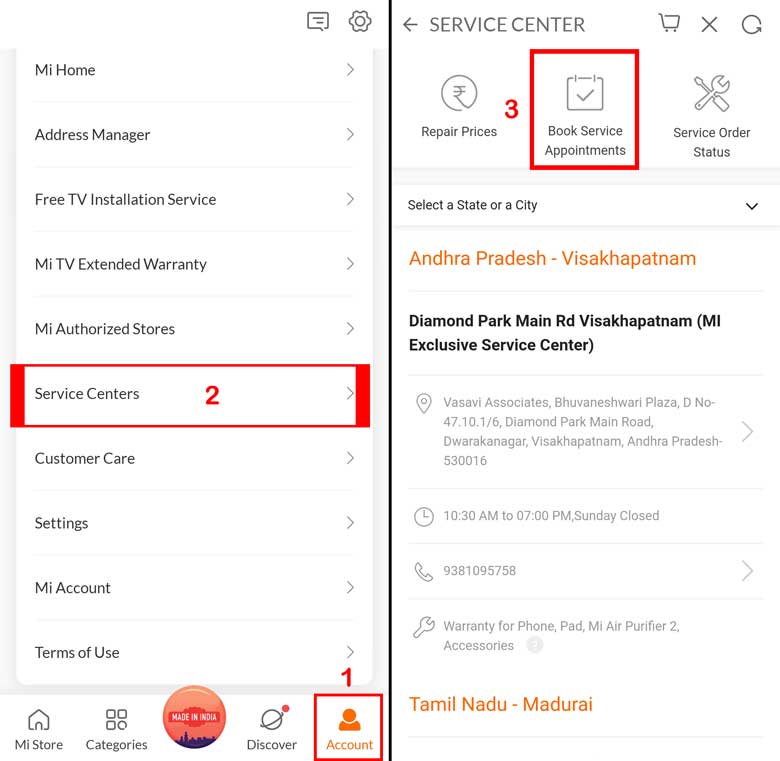
- Now click on Book service Appointments.
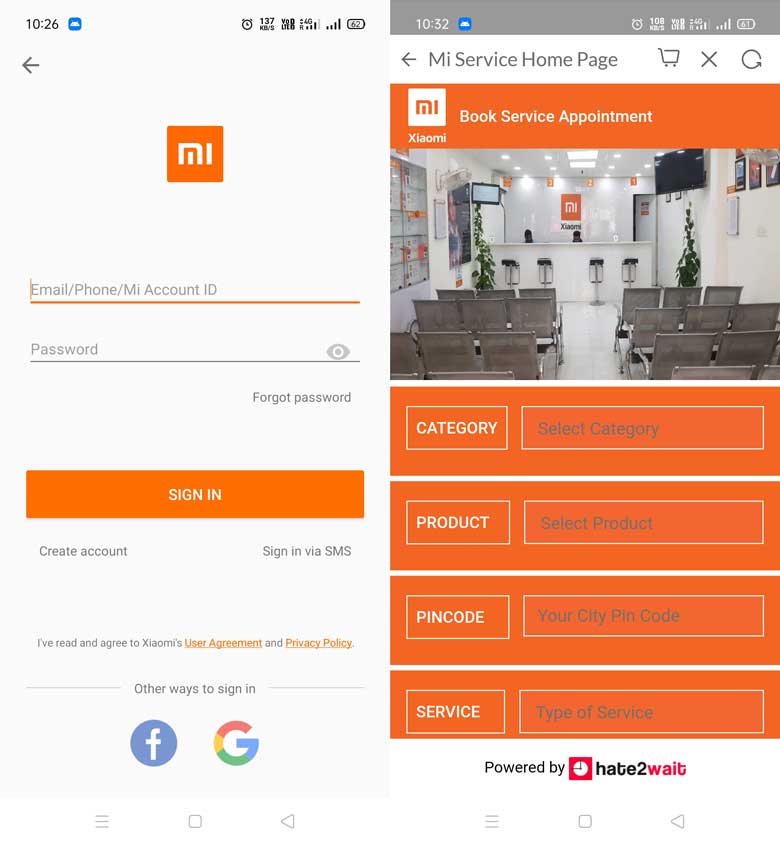
- Here select the required information.
- Provide more information like your name, mobile number, email id, date and time for the appointment.

- Accept terms and conditions and click on submit option.
- Verify captha and mobile number.
- Now you will get ASC Code and ASC contact number with appointment confirmation.
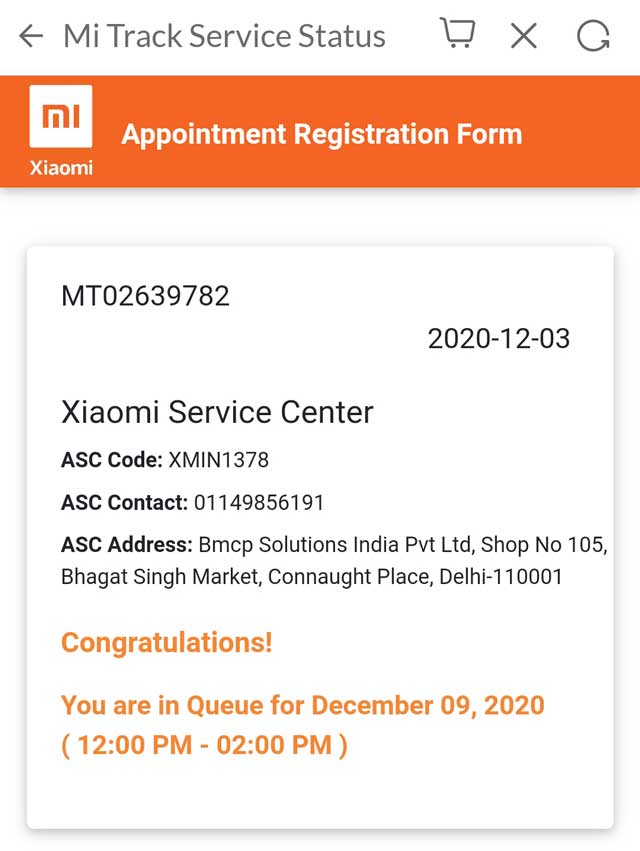
- You will also be notified with SMS at your registered mobile number.
- You have all done.
How to book Appointment for Mi TV installation
- Go to Mi Service Manager website to book appointment.
- Select On Door Appointment in Choose service type drop-down option.
- Enter Order/Serial Number & Click on Submit.
- Here select “TV” in Category, then select “Mi TV” in Product type, enter Pin code and select “Installation” in type of service.
- Now you will be redirected to new page.
- Here provide your additional details like your name, mobile number, email id and select date and time slot for installation of your Mi TV.
- Now accept the terms and conditions and click on submit option.
- Verify the CAPTCHA and your mobile number to successfully booking of your appointment.
- You have all done
More details about Xiaomi India to support your products and your queries.
- Mi Customer care number: 18001036286
- Mi official email id: service.in@xiaomi.com
- Mi official website: mi.com
- Mi online chat support: Chat with Mi
More Related Posts

Led 32
Mi led 32 inch smart
Charging problem
9045203751
Mera phone automatically reset ho ja raha hai
SPEAKER FAULT
LED 32 INCH 4A PRO, SPEAKER FAULD
Mi mobail repair karna hai jalna Maharashtra 431502
Mobile speaker fault
Redmi6A display change
Battery is not working
Redmi note 6 pro
hi
Volume switch not work.
Redmi9 power mobile off cheste on Aavadam ledu
Tomorrow I will come to service center wnp
Very useful information, I have fixed my issue after following the steps in written in this article.
My mi ph battery are not proper work